Useless Box – Nearly Finished!
Getting Close
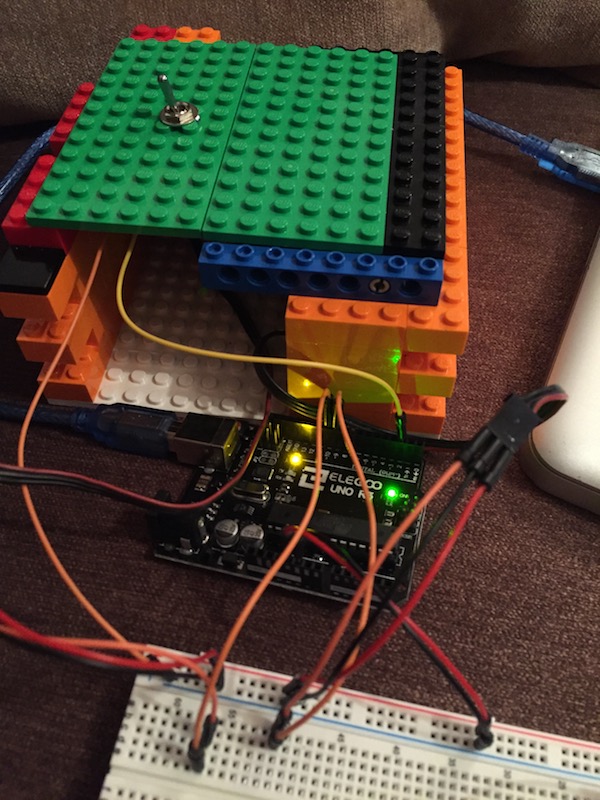
Another evening of ‘I Made A Thing’-ing, and I’m happy with the results.
I’ve used a ‘ProtoShield‘ to help tidy up the wiring. I’d recommend anyone to check them out, especially if your soldering skills are a bit rusty.
These slot straight onto the top of your Arduino, but can easily be removed if you need the Arduino later on for other projects – Without you needing to remove all your wires! Very handy.
Useless Box – Arduino
First Arduino/Servo test
I’ve popped the lid back on to the top of the box and used my breakout board as a ‘go between’ from the servos and Arduino. It all looks a bit messy at the moment, but this is only temporary.

Useless Box – The Finger (Pt 2)
Quick Update
I’ve been looking for a better ‘finger’ for my useless box. A Halloween-style finger would be great, but trying to find one of a suitable size was proving ‘tricky’.
So, after raiding my kids’ toy boxes I found the perfect thing – A Nerf dart! It’s small and light, and fits over my Lego finger ‘skeleton’ easily.
Bosh.
Useless Box – The Finger (Pt 1)
The Finger
So I’ve got a rudimentary ‘box’ built, and I know how to control the servos with an Arduino.
I figured the next step is to work on the ‘finger’. The design evolved through trial and error, with a goal to Keep Things Simple. There’s some cool and very clever implementations a Google search away, but I worked my own design out using Brains.
The photo here shows my initial design – A basic ‘C’ shape constructed (again) from Lego. The 90 degree joints are fairly strong, but I suspect in the long term I’ll be reinforcing them somehow. Superglue is always an option…

Useless Box – Lego Time
Designing The Box
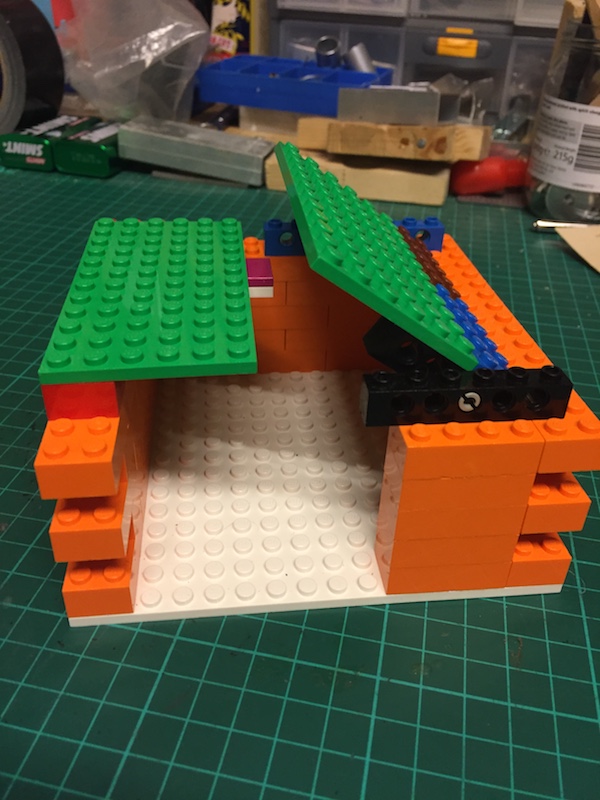
When it came to the box I was in two minds – Either I make it in wood, or Lego. (Give me a few months and ‘plastic’ would be an option – But I’m waiting until I buy a 3D printer…)
Wood has a certain charm, but Lego is much easier to work with and adds a nice ‘retro’ feel.
The design is simple, as you can see…

For now I’m leaving a hole in one side, allowing easy access without having to go through the top. I don’t know how tall the walls need to be (I’ve got to fit a couple of servos, a ‘finger’, and an Arduino in there yet!), so it’s all a bit ‘prototype’.
Good enough for now though!
Useless Box – The Servos
Servos
Getting a servo to move is a bit more complicated that getting an electric motor to spin, but not much so.
Servos are typically limited to being able to rotate 180 degrees, which means it’s not just a simple case of applying a voltage to make it ‘spin’.
Instead the Arduino can send a ‘pulsed’ signal to the servo which governs the position. There are many articles out there describing how to do this, but the Arduino servo library has excellent documentation and clear steps on the basics.
Thankfully the basics is all I need.
Useless Box – The Beginning
The Beginning
So this is it – My first Arduino project! After months of see YouTube videos and Twitter updates from people working on their own Arduino projects, I finally bit the bullet and bought my own ‘starter kit’ from Amazon.
I didn’t just want to make an LED flash on and off (One of the usual Arduino beginner projects) – I wanted to Make Stuff Move. Curtesy of a dad with a few spare radio control servos, and a bit of Googling, I felt ready to start making my Useless Box.
Coding is no problem – That’s what I do professionally – And as a child of the 80’s I’ve still got a LOT of Lego kicking about, there’s not much holding me back.
If you haven’t seen a ‘Useless Box’ before, go and check them out on YouTube. Simply put, you have a hinged box with a switch on it. You flick the switch, the box opens, and a ‘finger’ turns it off again.
That’s it.
Believe me – It’s more fun than it sounds.


